


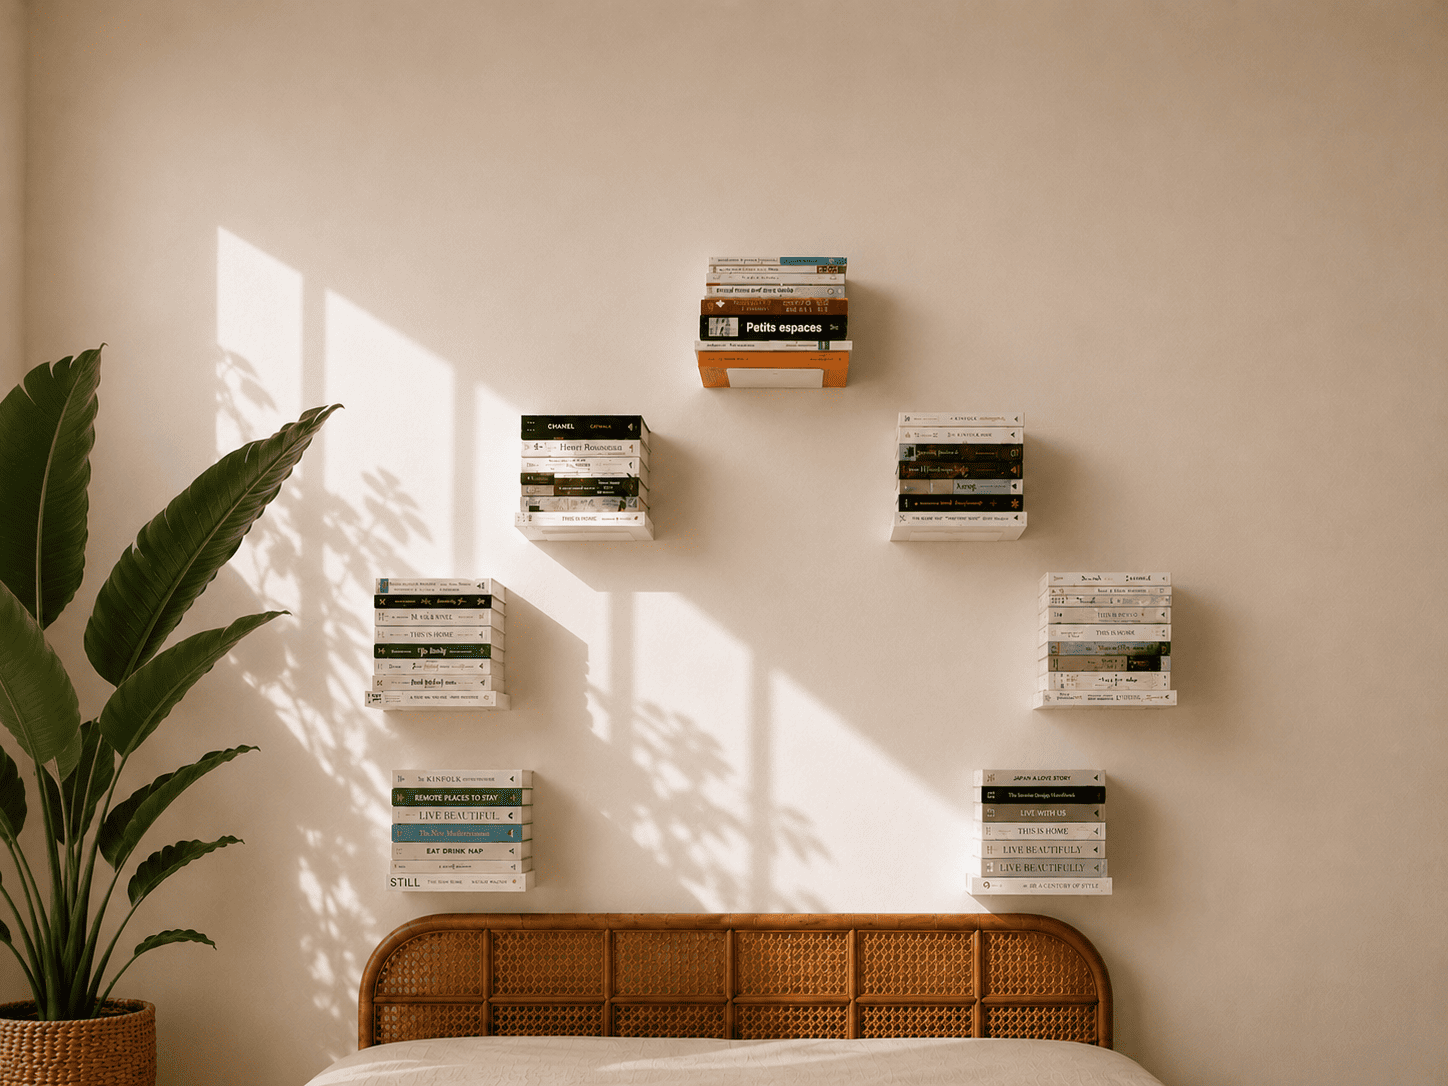
A home library is not a single bookcase pushed against a wall. It is a planned space, sized to the books you already own and to the ones you intend to keep buying. The difference between a corner that holds your novels and a room that actually reads as a library is mostly down to method.
This guide walks through the five stages that work, whether you have a full room or one wall to play with: sizing up the space, settling on a look, choosing the shelving system, installing it cleanly, and arranging the books so the result feels like a library rather than storage.
Start with the space, not the shelves

Most home libraries that disappoint started with a product, not a measurement. Someone saw a shelving system they liked, ordered it, and only then discovered that the skirting board was in the way or that the wall was a partition that flexes under load.
Begin with the wall itself. Plasterboard, brick and stud partition each take a different kind of fixing, and the difference matters once you stack ten kilos of hardbacks on a 60 cm shelf. Run a stud, pipe and cable detector across the area before any decision: knowing where the studs sit changes what shelving is sensible, and warns of any wiring or pipework hidden behind the plaster.
Then measure what is actually available. Floor to ceiling is not the same as floor to skirting; the height of a sofa or desk underneath eats into the bottom rows. Avoid the wall above a radiator whatever it looks like: warm air dries the spines and warps boards over a few winters.
Five quick checks before ordering anything:
- What is the wall made of (plasterboard, brick, stud partition, concrete)?
- How much vertical space do you have above any furniture sitting below?
- What needs to stay reachable, and how much breathing room do you want at the lower shelves?
- Is the wall an outside wall (cold and damp prone) or an internal one?
- Roughly how many running metres do you need for the current collection plus room to grow?
A rough capacity figure helps with the last point. A metre of average paperbacks weighs around 9 kg; a metre of hardbacks runs closer to 12 or 14 kg. A 60 cm steel shelf carries a fully packed row of fiction without complaint, but glossy art books and coffee-table editions need more depth and more thought.
Settle on a look before you order

Style decisions made on the day the shelves arrive are the ones that get regretted: decide the visual register before the cart is full.
Three clear directions exist. The visible-bracket industrial look puts metal frames on display alongside the books and suits taller ceilings and older flats. The invisible bracket route leaves only the books on the wall, which gives the floating effect that lands well in clean contemporary interiors. Full built-in joinery encloses the books in cabinetry: proper library look, slowest to fit, hardest to undo.
Finish carries half the visual weight. White shelves disappear against pale walls and let the spines do the talking; black gives the classic library feel and works against deep paint; warmer tones like rust or terracotta soften a room that risks reading austere. Eight finishes cover most palettes without drifting into the gimmicky.
The most useful exercise at this stage is a tape outline. Painter’s tape on the wall, in the exact dimensions of the shelves and at the heights you are considering, costs nothing and saves a lot. Live with it for a day. The space looks different at evening light than it did at noon, and what looked balanced on a Sunday morning often needs adjustment by Tuesday evening. For visual references, our guide to home library ideas shows how the same wall reads across the three directions.
Choose between modular sets and built-in joinery
Past the visual choice, the real arbitrage is between a modular system and built-in carpentry.

Modular sets are individual shelves designed to combine into a wider composition. You order what fits today, install in a single afternoon, and add to the wall later when the collection grows. Lead time is short, three to four working days for a Teebooks order against several weeks for any decent carpenter, and a modular set can be taken down or extended without replastering. The trade-off: each shelf is a discrete unit, so the look is rhythmic rather than seamless.
Built-in joinery delivers the bookcase-meets-wall effect that magazine shoots love. It is permanent, expensive, and worth the cost when you own the property and know exactly which wall you want to commit to. Expect quotes that run into four figures even on a single wall, and a wait of four to eight weeks once the joiner has measured.
For the practical middle path, wall-mounted bookshelves in Italian steel sit close to the wall, carry serious weight, and read as built-in once a few rows are stacked. Free-standing modular bookcases do the same job without a single hole drilled, which matters if you rent. For larger formats (coffee-table editions, art books, vinyl sleeves), large bookshelves with a 25 cm depth handle the dimensions that standard sets cannot.

One quiet advantage of starting modular: you can extend without replacing. A wall that holds six shelves today takes eight next year on the same fixings system. Built-in joinery cannot grow without a second visit from the carpenter, and a second invoice.
Prepare the wall and install

The shelves themselves are the easy part. Wall preparation is where the DIY hours actually go.
Detect first. A stud, pipe and cable detector run across the marked area picks up the wooden studs you want to fix into, and flags the wiring you do not want to drill through. Mark stud positions in pencil before any tape comes off the wall.
Then choose the right anchor. Solid brick and concrete take standard wall plugs without drama. Plasterboard is the variable: ordinary plugs spin uselessly, and a fully loaded shelf on the wrong fixings will pull away eventually. Hollow-wall anchors that expand behind the plasterboard distribute the load properly, and paired with concealed brackets they support roughly 20 kg per shelf on a partition wall. Where a fixing point can land in a stud, take it. Direct screwing into timber is the strongest of all options, and free.
The install itself, with a Teebooks shelf, comes down to five moves:
- Mark the bracket positions in pencil, levelled with a spirit level.
- Drill the pilot holes at the diameter your wall type requires.
- Tap in the plug or anchor, vacuum the dust out, and screw the bracket flush to the wall.
- Check level a second time before tightening fully.
- Slide the shelf onto the bracket, two screws per shelf, and confirm it sits flush.
First shelf takes the longest, roughly fifteen minutes once the wall is read. Subsequent shelves in the same composition run faster: drilling pattern and fixing type are already settled. A composition of six shelves on one wall is a weekend afternoon, not a project.
Arrange the books so it actually looks like a library

Once the shelves are up, the difference between storage and library is in the arrangement. Three methods cover most cases.
By subject is the librarian’s instinct: fiction together, history together, reference within reach of the desk. It is the easiest to live with day to day and the slowest to set up, since you have to sort the whole collection first.
By colour is the visual approach, with spines arranged by hue, full rainbow or muted blocks. It photographs well, it makes finding a specific book slower, and on a packed wall the effect can read as decorative rather than lived-in. Most home libraries that work end up hybrid: subject as the primary order, with colour and height tweaks within each shelf for balance.
Vary the verticals. A wall of perfectly upright spines reads flat. Lay a stack of two or three books horizontally at the end of a row, slide a small object into the gap (a piece of pottery, a framed print leant against the wall, a brass bookend). Leave roughly a tenth of the shelf empty rather than packing every centimetre; the eye needs the negative space.
Lighting matters more than people expect. Daylight bleaches spines and warps boards over the years, so avoid the temptation of a south-facing wall for any first editions. For evening reading, a small wall light angled along the spines reads each title clearly and pulls the books out of the dark. A floor lamp behind a reading chair completes the room rather than the bookcase.
The library is finished the day you can pull a book from any shelf without thinking. Until then, keep adjusting.
In practice
A home library is built in stages, not on a single shopping afternoon. Measure first, decide the look before the order, pick the shelving system that matches how long you plan to stay in the flat, install properly. Once the books are up, the arrangement does most of the visual work. The composition you start with rarely stays the same: most readers add rows within the first year, which is why a modular system is usually the sensible starting point.
Frequently asked questions
How much weight can a wall-mounted bookshelf hold?
A 60 cm steel shelf fixed into a stud or into solid brick carries a fully packed row of hardbacks without issue, comfortably over 15 kg. On plasterboard with proper hollow-wall anchors and concealed brackets, the practical limit drops to around 20 kg per shelf, including the shelf itself. Always check the manufacturer’s stated capacity for your specific model and fixing.
Can you fix floating bookshelves to plasterboard?
Yes, with the right anchors. Standard wall plugs are not enough for a loaded shelf on plasterboard. Hollow-wall fixings that expand behind the board, paired with the bracket designed for that fixing, hold reliably. Where a stud sits behind the plasterboard, take that fixing point: it is always the strongest option.
How long does it take to install a set of shelves?
Plan around fifteen minutes for the first shelf and roughly half that for each subsequent shelf in the same composition. A typical set of six shelves, including marking, drilling and fitting, takes a single afternoon for someone comfortable with a drill.
Modular bookshelves or built-in joinery, which is better?
Modular wins on lead time, flexibility and cost; built-in wins on seamlessness and visual impact. The practical test is whether the wall is permanent. If you own the home and know the layout will not change, built-in earns its price. If you rent, plan to extend the collection, or simply want the shelves up this week, modular is the rational call.